
All about App Service Migration Assistant
Hello Reader,
Today we will go through an example scenario where the customer wants to migrate their existing Employee management application from on-premises to the cloud and they are having below requirement
- No plan to re-architect legacy applications.
- Support to continue using On-premises Database
- Looking for simple and fast solution to migrate ASP.Net applications from on-premises to the cloud.
- Reduce On-Prem infrastructure cost
Key solution:
- Use Azure WebApp (PAAS service).
- Use Azure App service migration tool for assessment report and faster solution to migrate the application
- Azure Hybrid Connector for On-Prem DB connection
1. Pre-Requisites
- Azure Subscription (Active state)
- Application deployed on Internet Information Services (IIS).
2. Readiness check
| Check Type | Description |
| Port Binding | This readiness check ensures that the web app listens on only ports 80 (for HTTP traffic) and 443 (for HTTPS traffic) |
| Protocols | This readiness check ensures that the web app handles only HTTP-based protocols. |
| Certificates | If a Custom TLS certificate is available, the user will be alerted that it needs to be installed separately after migration has completed |
| Location tags | This readiness check identifies the use of location tags. Azure App Service apps use a preconfigured IIS applicationhost.config file and don’t support the location tags feature |
| ISAPI filters | The Migration Assistant won’t migrate an application that depends on an ISAPI filter. You first must remove the ISAPI filter from your application, migrate, and then add the ISAPI filter manually in Azure App Service. |
| Application pools | Azure App Service supports one application pool per app, this readiness check ensures that your web app relies on only a single application pool |
| Authentication type | If Authentication type other than Anonymous Authentication are detected, it will be necessary to change to Anonymous before the site can be migrated |
| Application settings | This readiness check warns you of custom application settings in the web.config file that should be moved to Azure App Service > Configuration > Application settings instead. |
| Connection strings | This readiness check determines if database connection strings stored in the web.config file are pointing to on-premises databases. If so, the Migration Assistant will give you the option to set up hybrid connections |
| Frameworks | The Migration Assistant supports only ASP.NET and PHP. If your app uses a different framework, you’ll be unable to perform the automatic migration. |
| Configuration error | This readiness check ensures that there are no underlying problems with the web app before migration. |
| Virtual directories | The Migration Assistant will move files into the appropriate subdirectories. But it can’t migrate applications with virtual directories that are backed by UNC shares. |
3. Architecture
Pre Migration
Please find the Employee internal portal architecture

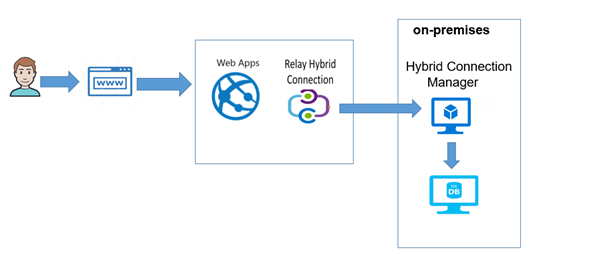
Post Migration
Please find the Employee portal architecture
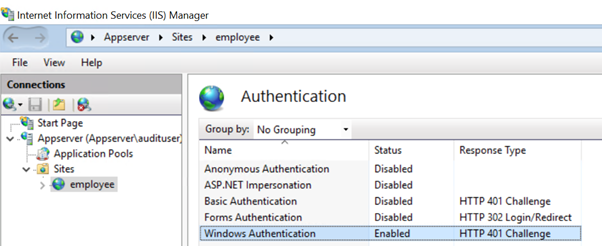
4. IIS Details
5. Employee Authentication Details
Employee web application is enabled with Windows Authentication
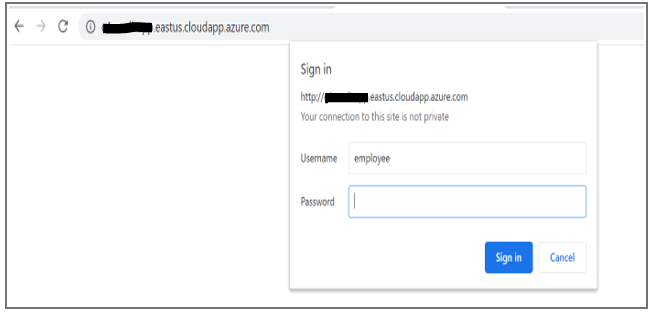
6. Web pages (Existing)
Please find the webpage details below
Authentication screen
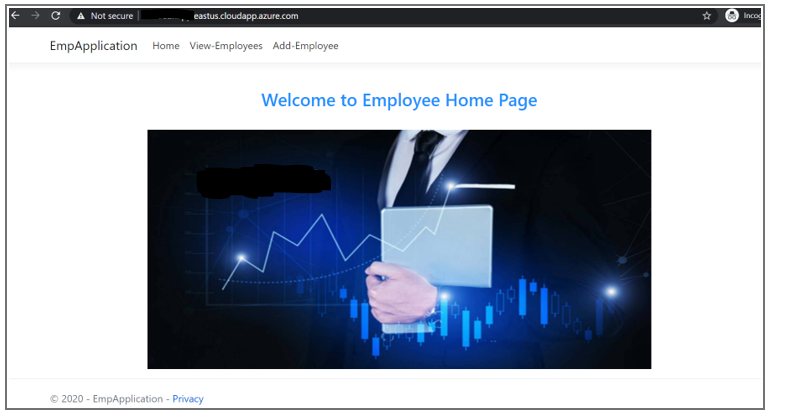
Home page
7. Migrate using the App Service Migration Assistant Tool
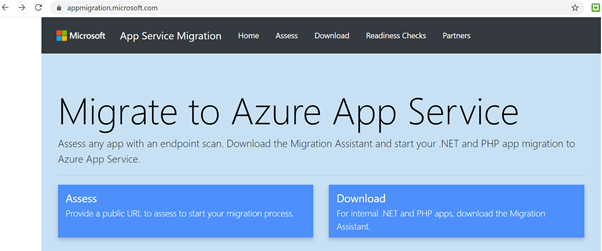
- Navigate to the below URL and download the migration tool on the IIS hosted machine
https://appmigration.microsoft.com/
- Once the tool download completes, run the MSI installer.
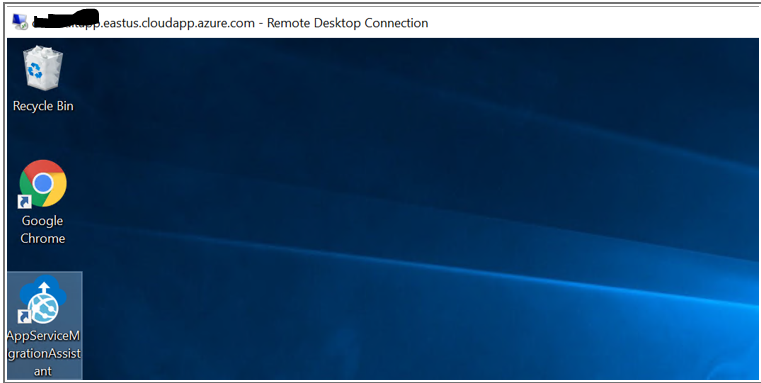
- Once installation completes, open migration tool by clicking on “AppServiceMigrationAssistant”.
4. Tool detects the employee application as shown below
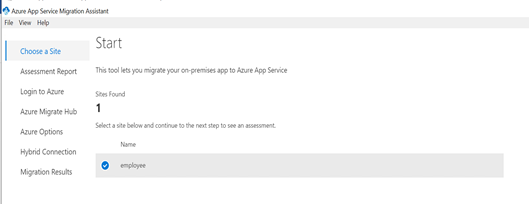
Click Next.
5. Assessment Report for ‘employee’ is generated as shown below
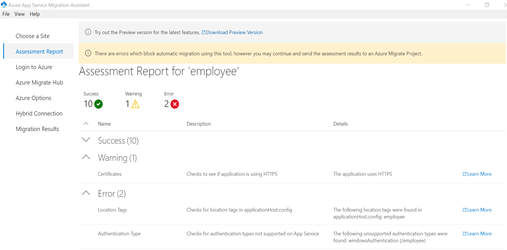
6. Errors need to be resolved prior to migration so we need to fix the above error and then retry the assessment report.

If everything looks good then click next
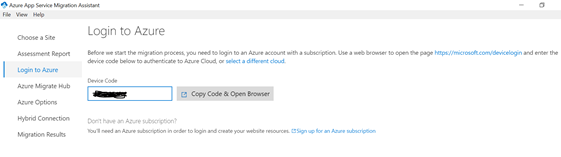
7. Click on Copy code & Open Browser
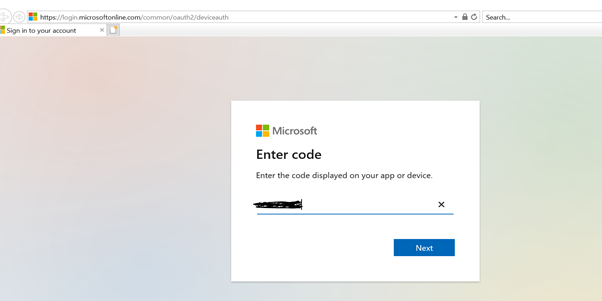
8. Paste the copied code on the text box and click next
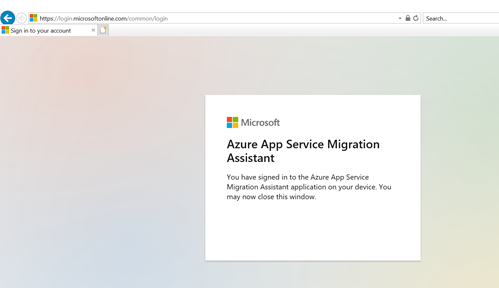
9. After successful verification, the below screen will be displayed
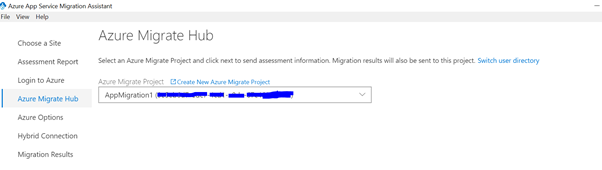
10. Open migration Assistant tool.
Under Azure Migration Hub, select migration project and click next
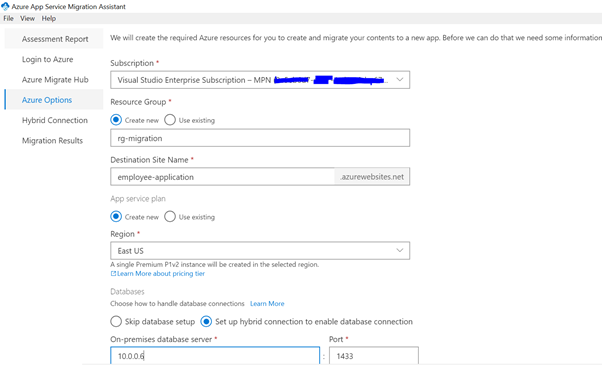
11. Select the subscription and provide all the required details and also select set up hybrid connection to enable database connection and provide database details
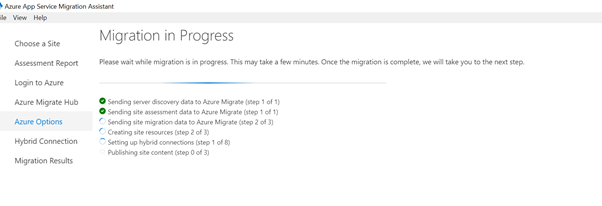
12. After clicking on Migrate button, migration in progress status will be displayed as shown below
13. Once the migration completes we will need to setup the hybrid connection.
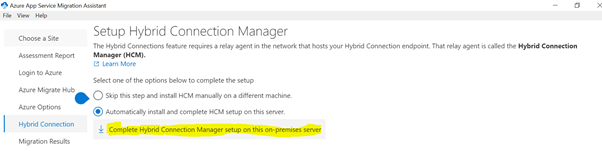
Click on Complete Hybrid Connection manager setup and download the MSI file
14. Once the download completes, run the MSI installer. Click the box to accept the license terms then click install
15. After successful completion we can view the Migration Results page as shown below
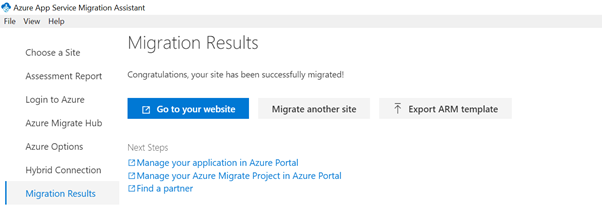
16. Click in Go to your website to view the site
8. Migration Result
Employee view page

Thank you for your precious time.


Thanks for your blog, nice to read. Do not stop.