CSP to CSP Transfer Azure Subscription (Step by Step)

PRE-REQUISITES/POINTS TO TAKE CARE OF
- The new CSP partner and the customer tenant must be in the same country
- If the new CSP Partner does not have a reseller relationship with the customer, they must establish one prior to the subscription being transferred (Refer to Appendix)
- Validate MCA is signed and Update the same on the Partner Center (Refer to Appendix)
- It is the New partner’s responsibility to create the service ticket that initiates the transfer process. Microsoft cannot intervene on behalf of the customer. The customer should plan to work closely with the current partner to make the transition go smoothly
- Third-party marketplace products will transfer as long as the products pass the Marketplace eligibility check
- The reservations applied in the customer’s environment will not be switched over to the new partner
SWITCH PARTNERS FOR AZURE SUBSCRIPTIONS
- To transfer an Azure subscription under an Azure plan, the customer must start the process by contacting their current partner. They should collect their current partner’s company name and domain so the new partnercan complete the transfer request generation on their behalf
- The customer must also identify the subscriptions they wish to transfer from their current partner. You cannot change partners for Office 365, Enterprise Mobility Suite, or Microsoft Dynamics CRM subscriptions
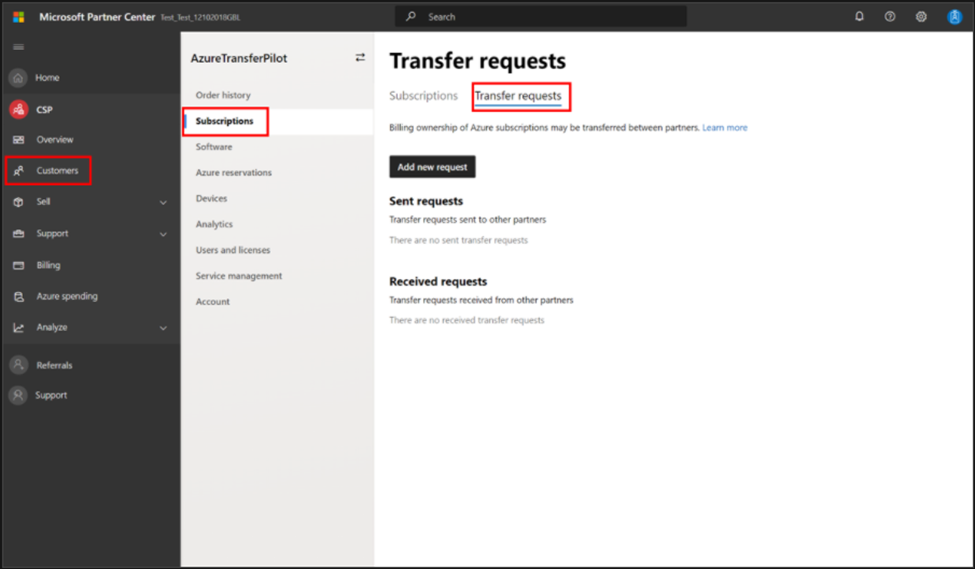
- The new partner of the subscription needs to complete a transfer request form from Partner Center to request a subscription transfer:
- In Step 1, From the Partner Center menu, select Customers, then select the customer you wish to complete a transfer request form on behalf of
- In Step 2, From the Customer menu, select Subscriptions
- In Step 3, Select the Transfer request section
- In Step 4, From the Transfer request section, select Add new request
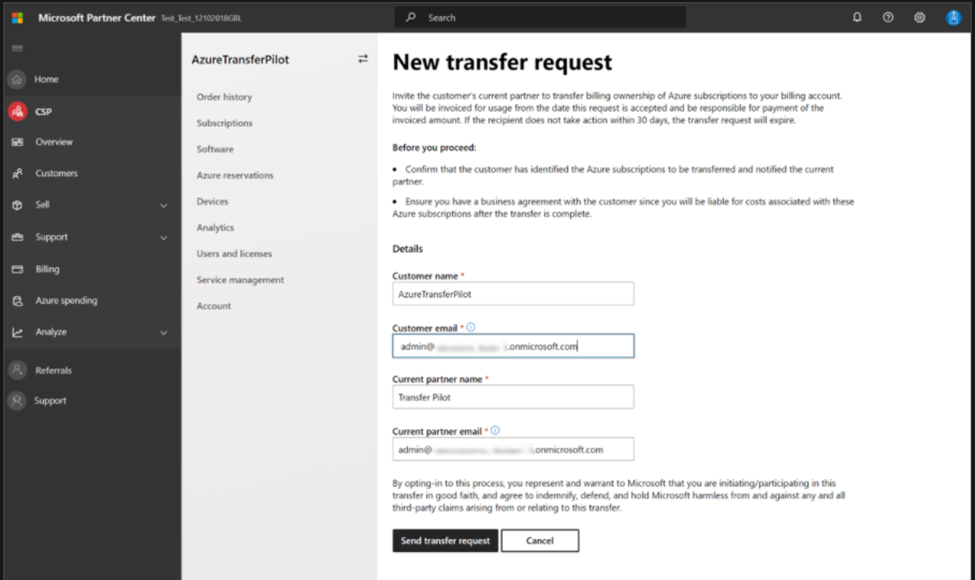
- In Step 5, Complete the New transfer request form
- In Step 6, Select Send transfer request > Send
- In Step 7, Review Transfer request confirmation

- The current partner’s Admin Agent of the customer will receive an email that their customer is requesting a transfer of their subscriptions, below are the step to be followed by the current partner:
- Review and accept the transfer request form from Partner Center to complete the subscription transfer
- Select Review transfer Request from the email OR
- From the Partner Center menu, select Customers, then select the customer that a transfer request has been submitted on behalf of
- From the Customer menu, select Subscriptions
- Select the Transfer request section
- Expand transfer information by selecting the chosen Transfer request ID under Received requests
- Review transfer request. Select the requested Azure subscriptions to transfer
- Then select Accept and transfer to complete the transfer process
- View transfer acceptance confirmation
- At this point, the new partner, the customer, and current partner will be notified of the accepted transfer request via email
- After, the transition has been accepted the transfer status might remain Pending for up to 15 minutes while the system is updated. If it takes longer, the system will keep trying for three days. If the transfer status remains Pending, the partner should submit a service request
- Once the transfer is complete, the subscriptions included within the request will appear in the Azure plan of the new partner, and no longer be listed with current partner
NOTE: The new partner can cancel the transfer request by selecting cancel request in the upper right-hand corner only when the transfer request status is “pending”. Once the transfer request status is “in progress” or “complete”, cancellations will not be possible
- New partner:
– Update the Azure subscription settings to remove the old partner from the account. To see which role assignments are provisioned, run two Powershell commandlets.
– Add the new partner as the reseller on the account:
– Add-AzureRMAccount -tenant "CustomerDomainName"
– To find the customer domain name: in the Partner Center menu, select Customers. Select the customer from the customer list. In the customer menu, select Account, and use the Domain name.
– View roles on the account, including previous CSP partners:
– Get-AzureRMRoleAssignment
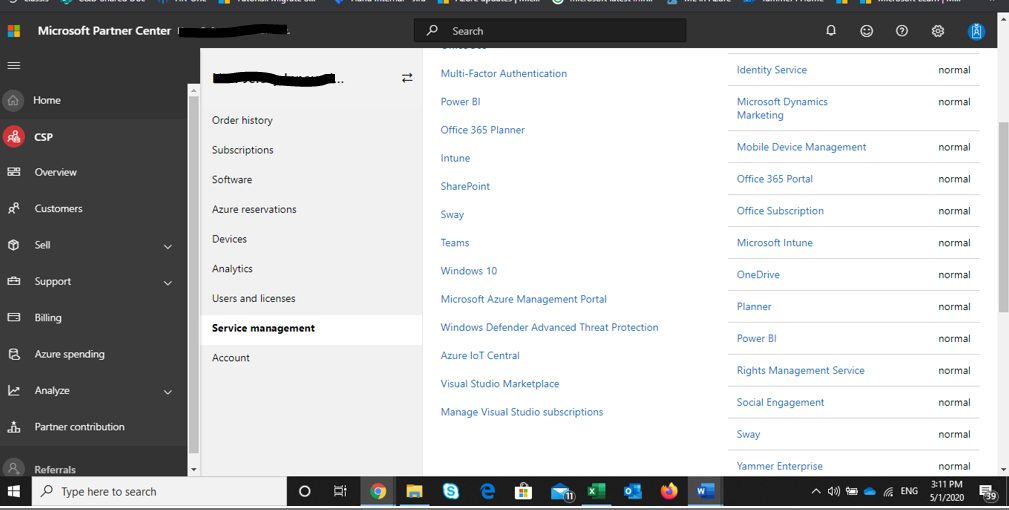
- Remove outdated access permissions
- In the Partner Center menu, select Customers.
- Expand the customer’s listing and select View subscriptions.
- In the customer menu, select Service management.
- Under Microsoft Azure, click the link to go to the Microsoft Azure Management Portal.
POST ONBOARDING CHECKLIST
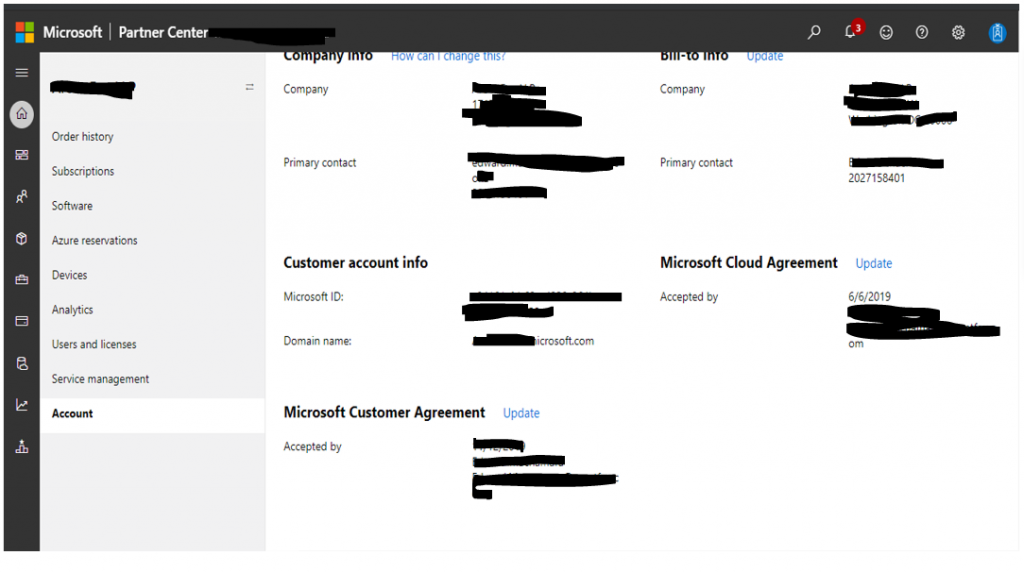
- MCA update on Partner Centre – Ensure and validate it’s Updated (Refer to Appendix)
- Establish AOBO with Customer’s subscription – If missing, run the script to add AOBO in the subscription (Refer to Post)
- Transition to Azure plan- validate that this is completed in Partner Centre
- Enable Azure Cost Management in Customer’s subscription from Azure Portal of Admin Agent (Refer to Appendix)
- If there were any reservations in the environment prior to switch over then apply the same again
MCA
- https://portal.azure.com (using partner admin agent credentials), like in this screenshot
Cost Management> Go to billing account> Customers> Click on Customer name> Azure subscriptions
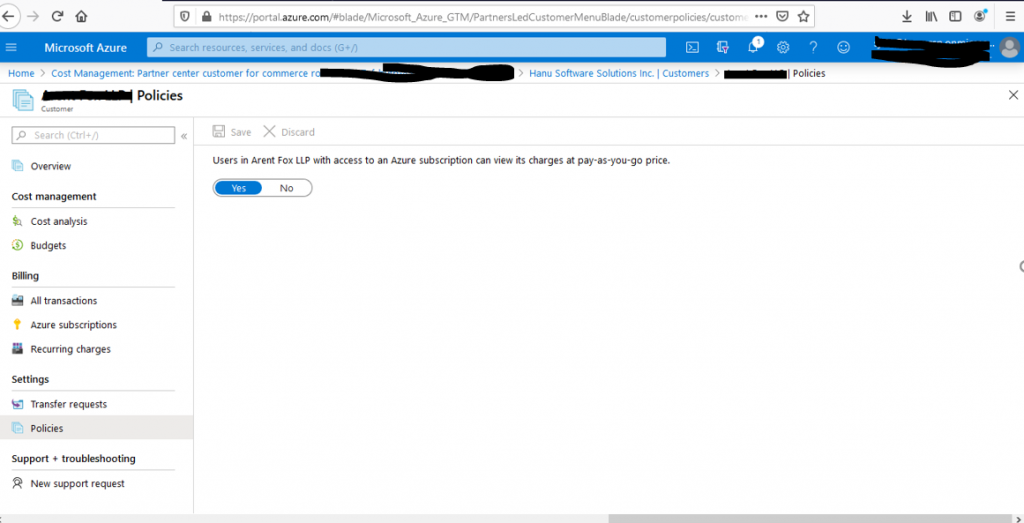
- https://portal.azure.com (using partner admin agent credentials), like in this screenshot
Cost Management> Go to billing account> Customers> Click on Customer name> Policies> Yes
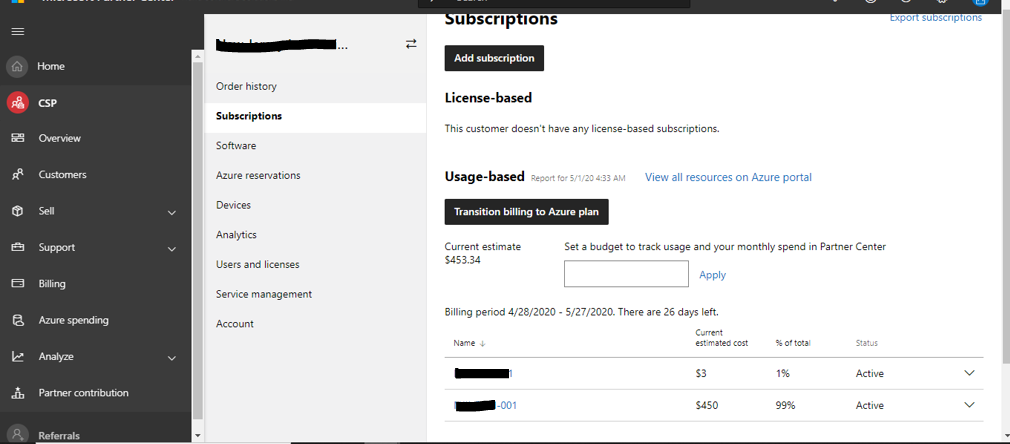
- Steps to verify that the customer is onboarded to Azure Plan
Login to Partner portal> Click on Customers> Click on customer name> Click on Subscriptions> Scroll down to the bottom to find Azure plan written at the last> Click on the drop down to view all the subscriptions under it
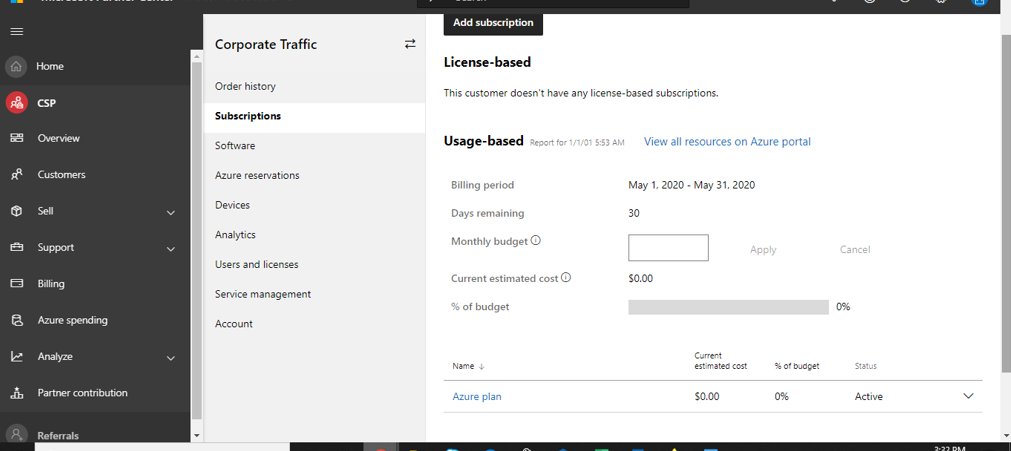
NOTE: In case the customer is not onboarded to Azure Plan yet, you will see this screen at the last step above. In this case, click on Transition billing to Azure plan> Continue and ensure that the customer is on Azure plan as above. It is mandatory for the customer to be on Azure Plan for Partner to receive PEC
- Steps to make Reseller relationship:
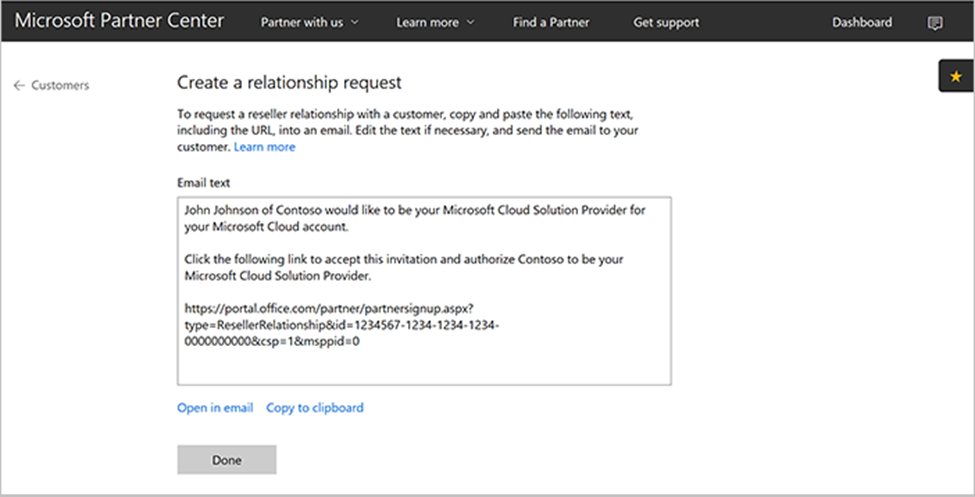
- In Partner Center (same region as Client’s), on the Dashboard menu, select Customers > Request a reseller relationship.

- On the Create a relationship request page, copy the email text that appears. You can edit or delete the first two paragraphs of the email text,but keep the link intact. The link in the email text applies specifically to your reseller account. The link doesn’t include any customer information. You can reuse the same link each time you request a reseller relationship.
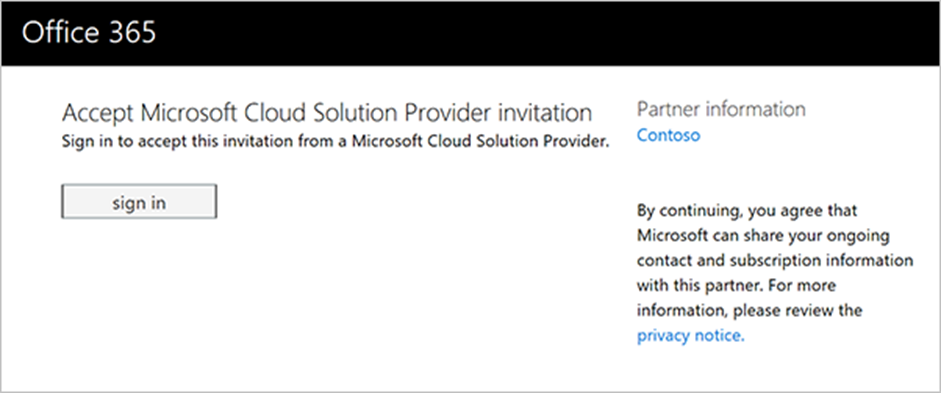
- Send the relationship request email to your customer. To accept the relationship request, the customer’s global admin selects the invitation link, and then signs in.
- On the Partner Relationships page, the customer can review their partners for their Azure services. This includes which partners who have delegated admin rights for each service.
- The invited customer appears in the partner’s customer list in Partner Center. The partner can then provision and manage the Azure CSP subscriptions for the customer.